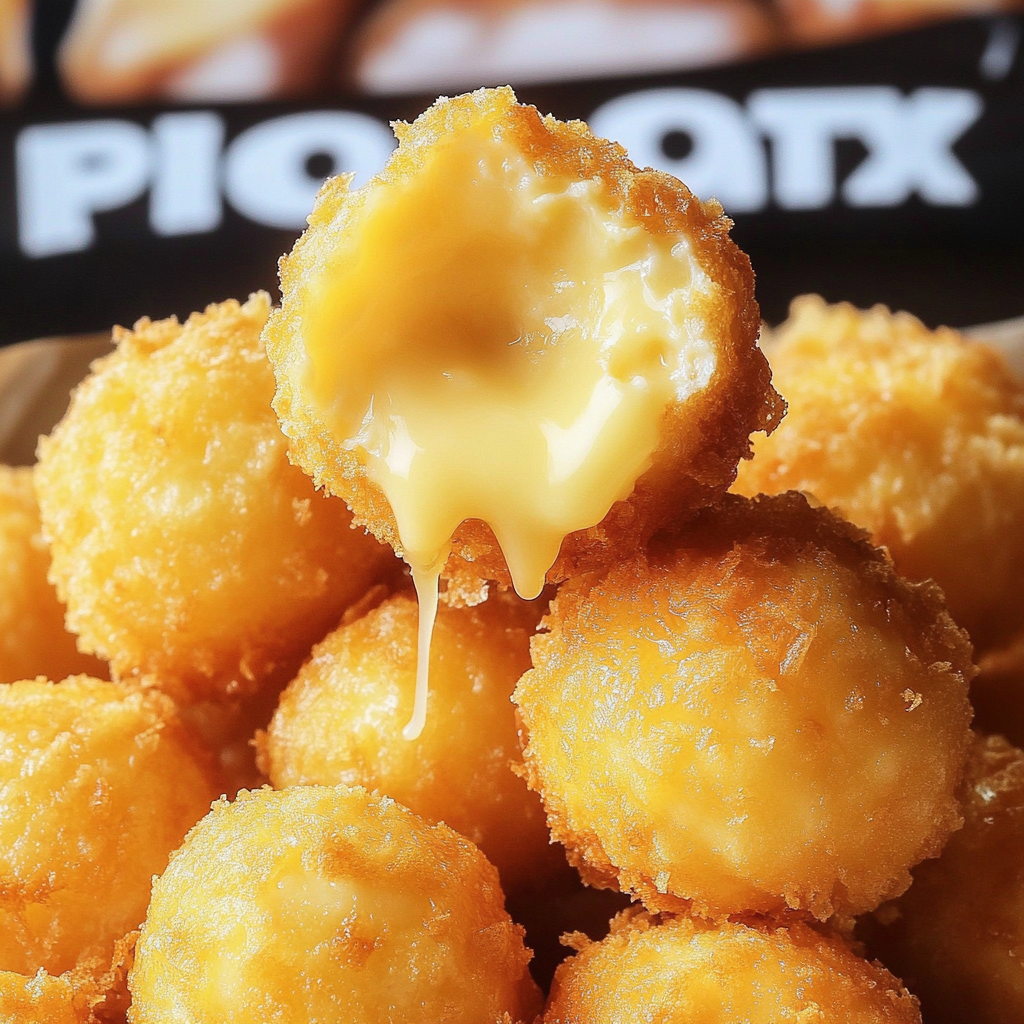
Fried cheese balls are the ultimate comfort food, bringing crispy delight and gooey goodness in every bite. Picture this: a golden-brown exterior giving way to a warm, cheesy center that practically sings with flavor. cheesy baked squash rounds As you pop one into your mouth, the aroma of melted cheese dances through the air, creating an irresistible invitation to indulge.

These little nuggets of joy have a special place in my heart. I remember making them for the first time during a casual get-together with friends, laughing as we attempted to fry them without turning the kitchen into a cheese-scented disaster zone. The excitement was palpable as we tasted our creations, and I still cherish those moments of camaraderie and culinary chaos. Whether it’s game night or a cozy movie marathon, fried cheese balls always add that extra sprinkle of happiness.
Why You'll Love This Recipe
- These fried cheese balls are incredibly easy to prepare, perfect for any skill level in the kitchen
- The rich flavor profile combines savory cheese with delightful spices, making each bite an explosion of taste
- Their golden appearance makes them visually appealing, turning any dish into a party centerpiece
- Plus, they’re versatile enough to serve as appetizers or snacks for any occasion!
Ingredients for Fried Cheese Balls
Here’s what you’ll need to make this delicious dish:
- Cheese (Mozzarella or Cheddar): Use fresh mozzarella for a stringy texture or sharp cheddar for an extra flavor kick.
- All-Purpose Flour: This is essential for creating the perfect coating; it helps achieve that crispy exterior.
- Eggs: You’ll need beaten eggs to help the flour stick to the cheese balls and create that delightful crust.
- Breadcrumbs: Opt for plain or seasoned breadcrumbs; they’ll give your cheese balls an irresistible crunch.
- Salt and Pepper: Simple seasonings that elevate the flavors of your fried cheese balls.
The full ingredients list, including measurements, is provided in the recipe card directly below.

How to Make Fried Cheese Balls
Follow these simple steps to prepare this delicious dish:
Step 1: Prepare Your Cheese
Cut the cheese into bite-sized cubes—about one inch works perfectly. Make sure they’re all roughly the same size for even frying.
Step 2: Set Up Your Breading Station
In three separate bowls, place flour in one, beaten eggs in another, and breadcrumbs mixed with salt and pepper in the third. This assembly line will ensure your cheese balls get coated evenly.
Step 3: Coat the Cheese
Take each cheese cube and roll it first in flour until fully coated. Then dip it into the egg mixture before finally rolling it in breadcrumbs until it’s completely covered.
Step 4: Heat Oil
In a deep frying pan or pot, heat about two inches of oil over medium-high heat until it reaches around 350°F (175°C). Drop a tiny piece of bread into the oil; if it sizzles immediately, your oil is ready!
Step 5: Fry Those Balls!
Carefully drop several coated cheese balls into the hot oil—don’t overcrowd them! Fry until they’re golden brown and delicious-looking—about three minutes per batch.
Step 6: Drain and Serve
Use a slotted spoon to remove cooked cheese balls and place them on paper towels to absorb excess oil. Serve warm with your favorite dipping sauce—trust me; you’ll want to savor every melty morsel!
Transfer to plates and drizzle with sauce for the perfect finishing touch. Enjoy your cheesy creation while reminiscing about those fun cooking moments!
You Must Know
- Fried cheese balls are not just a snack; they are a delightful treat that brings joy to any gathering
- Easy to prepare, these cheesy bites are crispy on the outside and gooey on the inside, making them irresistible for cheese lovers everywhere
Perfecting the Cooking Process
Start by heating your oil to the right temperature before frying the cheese balls. While the oil heats up, prepare your batter and shape the cheese into balls. This sequence ensures that each ball fries perfectly, resulting in that golden-brown exterior we all crave.
Add Your Touch
Feel free to customize your fried cheese balls with different cheeses like mozzarella or cheddar. You can also add spices like garlic powder or herbs for an extra flavor kick. Don’t hesitate to mix in some jalapeños for a spicy twist!
Storing & Reheating
Store leftover fried cheese balls in an airtight container in the fridge for up to three days. To reheat, pop them in an oven at 350°F for about 10 minutes to restore their crispiness—no one likes soggy snacks! For more inspiration, check out this Cottage Cheese Egg Bites recipe.
Chef's Helpful Tips
- Perfecting fried cheese balls requires attention to detail
- Ensure your oil is hot enough before frying to achieve that perfect crunch
- Use a light hand when shaping the cheese balls to prevent them from falling apart during cooking
- Always serve them fresh for maximum flavor and texture!
I remember the first time I made fried cheese balls for a family gathering. My cousin took one bite and exclaimed, “These are better than my last few relationships!” That kind of feedback is what keeps me whipping these up every chance I get!
FAQs:
What are Fried Cheese Balls?
Fried cheese balls are delicious bite-sized snacks made from a combination of cheese and other ingredients, often including flour, herbs, and spices. Typically coated in breadcrumbs, these savory treats are deep-fried until golden brown and crispy. They can be enjoyed as appetizers or party snacks, and they pair perfectly with various dipping sauces like marinara or ranch. Their crispy exterior and gooey interior make them a favorite among cheese lovers. For more inspiration, check out this Crispy Coconut Shrimp recipe.
How do you store leftover Fried Cheese Balls?
To store leftover fried cheese balls, allow them to cool completely after frying. Place them in an airtight container and refrigerate for up to three days. If you want to keep them longer, consider freezing them. Freeze the cheese balls in a single layer on a baking sheet before transferring them to a freezer-safe bag or container. When you’re ready to enjoy them again, reheat in the oven for best results, ensuring they regain their crispy texture.
Can I make Fried Cheese Balls ahead of time?
Yes, you can prepare fried cheese balls ahead of time! You can shape the cheese balls and store them in the refrigerator for a few hours before frying. Alternatively, you can freeze uncooked cheese balls and fry them directly from the freezer when needed. Just increase the frying time slightly to ensure they cook through properly. This makes it convenient for parties or gatherings where you want to serve freshly fried snacks without much hassle.
What types of cheese work best for Fried Cheese Balls?
When making fried cheese balls, it’s essential to choose cheeses that melt well and have great flavor. Cheddar is a popular choice due to its sharpness and meltiness. Mozzarella provides a delightful stretchiness when melted, while cream cheese adds creaminess. You can also experiment with combinations of cheeses like pepper jack for a spicy kick or feta for a tangy twist. The key is to ensure that your selected cheeses blend well together for maximum flavor.
Conclusion for Fried Cheese Balls:
In summary, fried cheese balls are irresistible snacks that combine rich flavors and delightful textures. With various cheeses and seasonings available, you can customize them to suit your taste preferences. Whether served as an appetizer at parties or as a comforting treat at home, these cheesy bites are sure to please everyone. crispy shrimp and cabbage egg rolls cheesy pizza pockets By following simple storage tips and preparation methods outlined above, you can enjoy delicious fried cheese balls anytime!

Fried Cheese Balls
- Total Time: 30 minutes
- Yield: Approximately 6 servings (18 cheese balls) 1x
Description
Fried cheese balls are a delicious snack that combines a crispy exterior with a melty, gooey center. These bite-sized delights are perfect for parties or cozy nights in, offering endless flavor possibilities with different cheeses and spices. Serve them warm with your favorite dipping sauces for an irresistible treat that everyone will love.
Ingredients
- 1 cup shredded mozzarella cheese
- 1 cup all-purpose flour
- 2 large eggs, beaten
- 1 cup breadcrumbs (plain or seasoned)
- 1 tsp salt
- 1/2 tsp black pepper
- Oil for frying
Instructions
- Cut mozzarella into one-inch cubes.
- Set up three bowls: one with flour, one with beaten eggs, and the last with breadcrumbs mixed with salt and pepper.
- Coat each cheese cube in flour, dip in eggs, and roll in breadcrumbs until fully covered.
- Heat oil in a deep pan to 350°F (175°C). Test readiness by dropping in a small piece of bread; it should sizzle.
- Fry cheese balls in batches for about three minutes each until golden brown, ensuring not to overcrowd the pan.
- Remove using a slotted spoon and drain on paper towels.
- Prep Time: 15 minutes
- Cook Time: 15 minutes
- Category: Snack/Appetizer
- Method: Frying
- Cuisine: American
Nutrition
- Serving Size: 3 cheese balls (90g)
- Calories: 280
- Sugar: 0g
- Sodium: 480mg
- Fat: 17g
- Saturated Fat: 8g
- Unsaturated Fat: 9g
- Trans Fat: 0g
- Carbohydrates: 24g
- Fiber: 1g
- Protein: 10g
- Cholesterol: 80mg


