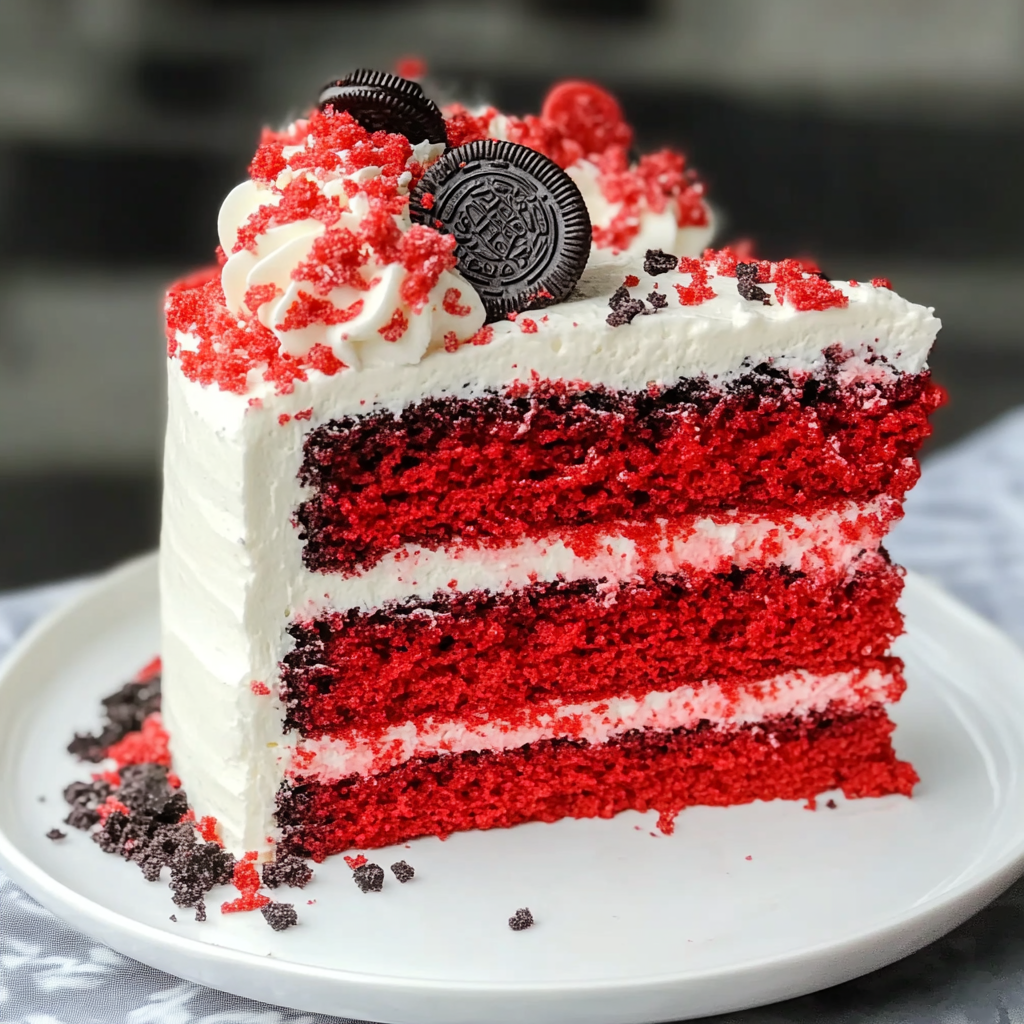
Red Velvet Oreo Cake is not just a dessert; it’s a celebration of life, love, and the pure joy of eating something ridiculously delicious. Imagine biting into a cake that combines the rich, velvety texture of classic red velvet with the delightful crunch of Oreos. It’s like a party in your mouth where everyone is invited, and trust me, you want to be on this guest list. The aroma wafts through the air, teasing your senses and promising an experience that goes beyond just taste.

Now picture this: it’s your best friend’s birthday, and you’re tasked with bringing dessert. The pressure is on! You want to impress without losing your sanity in the kitchen. This Red Velvet Oreo Cake is your knight in shining armor, ready to save the day. It’s visually stunning—garnished with crushed Oreos and drizzled with cream cheese frosting—and perfect for any occasion from birthdays to Tuesday nights when you just need to treat yourself after a long day.
Why You'll Love This Recipe
- This Red Velvet Oreo Cake is easy to prepare, so you can whip it up even if you’re not a master baker
- The flavor profile combines rich chocolate with tangy cream cheese frosting for a delightful taste explosion
- Its vibrant red color makes it an eye-catching centerpiece for any gathering
- Plus, this cake is versatile enough for birthdays, anniversaries, or even just because you deserve cake!
Ingredients for Red Velvet Oreo Cake
Here’s what you’ll need to make this delicious dish:
- All-Purpose Flour: Essential for structure; make sure it’s measured accurately for best results.
- Cocoa Powder: Choose unsweetened cocoa powder for that deep chocolate flavor; Dutch-processed works wonders too.
- Baking Soda: This helps the cake rise beautifully; don’t confuse it with baking powder!
- Buttermilk: The secret ingredient that adds moisture and gives that classic red velvet tang.
- Vegetable Oil: Keeps the cake moist; butter will work too but oil gives a lighter texture.
- Red Food Coloring: Use gel coloring for more vibrant results without altering texture.
- Eggs: They bind everything together and add richness; opt for large eggs for consistency.
- Oreos: Crushed to sprinkle throughout and on top of the cake; regular or double-stuffed works!
- Cream Cheese Frosting: A must-have topping made from cream cheese, butter, powdered sugar, and vanilla extract.
The full ingredients list, including measurements, is provided in the recipe card directly below.

How to Make Red Velvet Oreo Cake
Follow these simple steps to prepare this delicious dish:
Step 1: Preheat Your Oven
Start by preheating your oven to 350°F (175°C). Grease two round cake pans with cooking spray or butter and dust them lightly with flour. This prevents sticking—because no one wants half their cake stuck to the pan!
Step 2: Mix Dry Ingredients
In a large bowl, combine all-purpose flour, cocoa powder, baking soda, and salt. Whisk them together until well blended. This step ensures that your leavening agents are evenly distributed throughout the cake.
Step 3: Combine Wet Ingredients
In another bowl, combine buttermilk, vegetable oil, sugar, eggs, vanilla extract, and red food coloring. Beat everything together until smooth. The mixture should look like a lovely shade of crimson—perfectly appetizing!
Step 4: Combine Mixtures
Gradually add the dry ingredients into the wet mixture while stirring gently until just combined. Be careful not to over-mix as we want our cake light and fluffy!
Step 5: Fold in Oreos
Carefully fold in about one cup of crushed Oreos into the batter. This will give every bite a delightful surprise crunch that pairs perfectly with that rich velvet base.
Step 6: Bake & Cool
Pour the batter equally into the prepared pans and bake in your preheated oven for about 25–30 minutes or until a toothpick inserted comes out clean. Allow cakes to cool in pans for about ten minutes before transferring them to wire racks to cool completely.
Finally: Frost & Serve
Once cooled completely, spread cream cheese frosting generously between layers and on top of your beautiful creation. Top it off with more crushed Oreos because why not? Slice it up and serve it at your next gathering—or keep it all for yourself—no judgment here.
This Red Velvet Oreo Cake isn’t just a dessert; it’s an experience filled with laughter and flavors that’ll leave everyone asking for seconds—and maybe thirds! Enjoy every slice knowing you’ve created something unforgettable!
You Must Know
- This delightful Red Velvet Oreo Cake is not just a feast for the eyes; it’s a celebration of flavor
- With its rich, moist layers and creamy frosting, it’s perfect for birthdays, anniversaries, or just because it’s Wednesday
- Your guests will rave about it!
Perfecting the Cooking Process
To achieve the ultimate Red Velvet Oreo Cake, start by baking the cake layers first. While they cool, prepare the cream cheese frosting to ensure it’s fluffy and ready to go when you assemble your masterpiece.
Add Your Touch
Feel free to customize this recipe with different fillings like chocolate ganache or even crushed Oreos mixed into the frosting. You can also swap buttermilk for yogurt if you’re feeling adventurous!
Storing & Reheating
Store your Red Velvet Oreo Cake in an airtight container in the fridge for up to five days. If you want to enjoy it warm, pop individual slices in the microwave for about 10 seconds.
Chef's Helpful Tips
- Start with room temperature ingredients for a smoother batter that combines easily
- Don’t overmix once you add dry ingredients; this keeps your cake tender
- For easier layering, freeze the cake slightly before cutting to prevent crumbs from getting everywhere
Sometimes I catch myself reminiscing about that time my friends devoured this cake within minutes at a party. Their delighted faces said it all—it’s a hit every single time!
FAQs :
What is Red Velvet Oreo Cake?
Red Velvet Oreo Cake is a delightful dessert that combines the classic red velvet flavor with the rich, creamy taste of Oreo cookies. This cake features layers of moist red velvet sponge and a delicious Oreo cream cheese frosting, making it a perfect treat for celebrations or everyday indulgence.
How do I store Red Velvet Oreo Cake?
To keep your Red Velvet Oreo Cake fresh, store it in an airtight container at room temperature for up to three days. If you want to extend its shelf life, refrigerate it for up to a week. You can also freeze slices of the cake wrapped tightly in plastic wrap for up to three months.
Can I make Red Velvet Oreo Cake ahead of time?
Yes, you can make Red Velvet Oreo Cake ahead of time. Bake the cake layers and let them cool completely. Wrap them in plastic wrap and refrigerate for up to two days or freeze for longer storage. Frost the cake on the day you plan to serve it for optimal freshness.
What are some variations of Red Velvet Oreo Cake?
You can experiment with different flavors by adding extracts such as almond or vanilla to the batter. Additionally, consider incorporating crushed Oreos into the cake layers or substituting the cream cheese frosting with whipped cream or buttercream for a different texture and taste.
Conclusion for Red Velvet Oreo Cake :
In summary, Red Velvet Oreo Cake is a show-stopping dessert that beautifully blends classic flavors with modern twists. Its vibrant color and rich taste make it an ideal choice for various occasions. Whether you enjoy it as is or customize it with your favorite flavors, this cake is sure to impress your guests and satisfy your sweet tooth. Enjoy baking this delectable treat!

Red Velvet Oreo Cake
- Total Time: 50 minutes
- Yield: Serves approximately 10 slices 1x
Description
Red Velvet Oreo Cake is a show-stopping dessert that beautifully combines the rich flavors of classic red velvet with the delightful crunch of Oreos. Topped with a luscious cream cheese frosting and garnished with crushed Oreos, this cake is perfect for birthdays, anniversaries, or simply to satisfy your sweet tooth. Its vibrant color and creamy texture make it an irresistible centerpiece for any occasion.
Ingredients
- 2 cups all-purpose flour
- 1 cup granulated sugar
- 1 tsp baking soda
- 1/2 cup unsweetened cocoa powder
- 1 tsp salt
- 1 cup buttermilk
- 1 cup vegetable oil
- 2 large eggs
- 2 tbsp red gel food coloring
- 1 tsp vanilla extract
- 1 cup crushed Oreos (plus more for garnish)
- 8 oz cream cheese, softened
- 1/2 cup unsalted butter, softened
- 4 cups powdered sugar
- 1 tsp vanilla extract
Instructions
- Preheat oven to 350°F (175°C). Grease and flour two round cake pans.
- In a large bowl, whisk together flour, sugar, baking soda, cocoa powder, and salt.
- In another bowl, mix buttermilk, vegetable oil, eggs, food coloring, and vanilla until smooth.
- Gradually combine wet and dry ingredients until just mixed. Fold in crushed Oreos.
- Divide batter between pans and bake for 25–30 minutes or until a toothpick comes out clean.
- Cool in pans for ten minutes before transferring to wire racks.
- In a mixing bowl, beat cream cheese and butter until creamy. Gradually add powdered sugar and vanilla until fluffy.
- Frost the cooled cake layers with cream cheese frosting and garnish with additional crushed Oreos.
- Prep Time: 20 minutes
- Cook Time: 30 minutes
- Category: Dessert
- Method: Baking
- Cuisine: American
Nutrition
- Serving Size: 1 slice (100g)
- Calories: 450
- Sugar: 35g
- Sodium: 320mg
- Fat: 24g
- Saturated Fat: 10g
- Unsaturated Fat: 12g
- Trans Fat: 0g
- Carbohydrates: 54g
- Fiber: 2g
- Protein: 5g
- Cholesterol: 70mg


